16×16 · Pixels: 0
Generating...
Diameter (px)
Style
Thickness: 1
Minecraft circle generator
Making a circle out of blocks is the one build every player gets wrong by eye, because a square grid cannot draw a true circle. This circle maker works out the roundest arrangement for whatever diameter you need and shows you the block count before you start digging. Set the size, pick a style, and read it off as a layer plan.
It is the same tool either way you come at it. A Minecraft layer and a pixel art circle are the same grid problem, so this doubles as a pixel circle generator for sprite work: coins, shields, UI buttons, anything round on a small canvas. Runs in your browser, no login, nothing to install.
How it works
- Set the diameter in blocks (or pixels, same grid). Unlink the two numbers for an oval
- Pick a style: Outline, Thick outline, or Filled
- Read the block count above the preview
- Download as PNG or SVG, export Minecraft commands, or just build from the screen
Build it without placing every block
Take Minecraft function (.mcfunction) or Copy Minecraft commands from the download menu. You get commands that build the layer at your feet, on relative coordinates centred where you stand, so you drop into position and run it.
Rows are merged into fill commands rather than one setblock per block, which is the difference between 256 commands and 51,468 on a filled 256 circle. Here is the start of a 21-diameter thick outline:
fill ~-3 ~ ~-10 ~3 ~ ~-10 minecraft:dirt
fill ~-5 ~ ~-9 ~-3 ~ ~-9 minecraft:dirt
fill ~3 ~ ~-9 ~5 ~ ~-9 minecraft:dirt
fill ~-6 ~ ~-8 ~-5 ~ ~-8 minecraft:dirt
setblock ~5 ~ ~-8 minecraft:dirt
Everything comes out as minecraft:dirt. There is no block picker on purpose: nobody remembers whether it is polished_blackstone_bricks or polished_blackstone_brick, and a typo makes a command fail silently. Find and replace minecraft:dirt with whatever you actually want:
fill ~-3 ~ ~-10 ~3 ~ ~-10 [your block]Put the .mcfunction in a datapack and call it with /function, or paste the commands into a command block. No leading slash is needed in either, only in the chat bar.
Centre guides are on by default: faint lines down the middle row and column so you can count outward from the centre while placing blocks. They are preview only and never appear in the file you download.
Making your own Minecraft textures
Circles are the shape, but the blocks themselves are the other half of a build. There is an AI sprite generator on this site that makes pixel art at whatever size you ask for, which is how these were made:
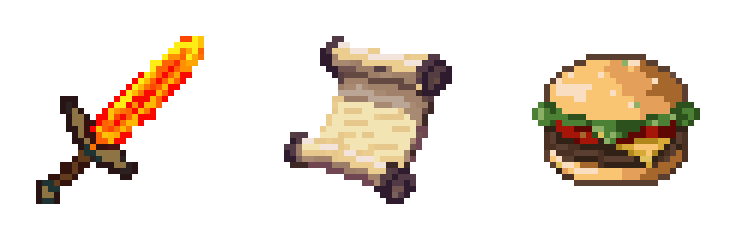
All three are 32×32 with fewer than 20 colours, straight out of the generator with no cleanup. That is the size a 32x resource pack uses, so they drop into a texture pack as-is. Worth knowing up front: the generator starts at 32×32, so it is not the tool for vanilla 16×16 textures. It is the tool if you are building an HD pack, or want item art for a server, a map, or a mod.
Describe the item, pick 32×32, get it back on that grid. 15 free generations with no card, and another 10 for joining the Discord. The sprites are yours to use.
The three styles, same 21 diameter
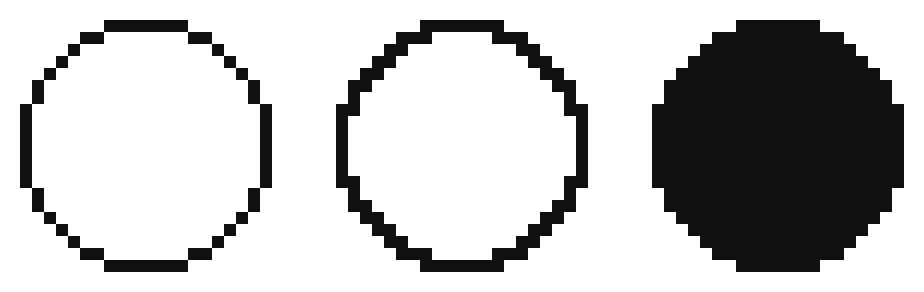
Left to right: Outline at 56 blocks, Thick outline at 80, Filled at 349. Look at the corners on the first two. The outline steps diagonally, so blocks meet at a point with a gap between them. The thick outline fills that gap in. Same circle, same diameter, different wall.
Ovals
Click the link button between the two size fields to unlink them, and the tool becomes an oval generator: set width and height independently and it plots the roundest ellipse for that box. Thick outline works the same way on an oval, sealing every diagonal corner around the curve.
Ovals are what you want for arenas, stadium floors, racetracks, boat hulls, and anything longer than it is wide. In sprite work they make eyes, shields, and UI pills. Any combination from 2 to 256 on each side works.
Minecraft circle chart
Block counts for one layer at the sizes people build most. Odd diameters have a single centre block, which is what you want for a tower you can stand in the middle of.
| Diameter | Outline | Thick outline | Filled |
|---|---|---|---|
| 5 | 12 | 16 | 21 |
| 7 | 16 | 24 | 37 |
| 9 | 24 | 32 | 69 |
| 11 | 28 | 40 | 97 |
| 13 | 36 | 48 | 137 |
| 15 | 40 | 56 | 177 |
| 17 | 48 | 64 | 225 |
| 19 | 52 | 72 | 293 |
| 21 | 56 | 80 | 349 |
| 25 | 68 | 96 | 489 |
| 31 | 84 | 120 | 749 |
| 41 | 112 | 160 | 1,313 |
| 51 | 144 | 200 | 2,053 |
| 64 | 180 | 252 | 3,228 |
Multiply the outline or thick-outline number by your wall height for a tower. Filled is what a floor or a dome cap costs. Any diameter from 2 to 256 works in the generator, the chart just covers the common ones.
Which style to use
- Thick outline for walls that have to hold something. Every diagonal corner is sealed, so no water or mobs slip through the gaps
- Outline for the shape alone, when nothing needs to be contained. Fewer blocks
- Filled for floors, ceilings, and the top of a dome
What people build with it
- Round towers, silos, and wizard spires, one layer repeated upward
- Domes and spheres, changing the diameter layer by layer
- Circular walls around a base or a farm
- Pixel art circles for sprite bases, coins, shields, and UI buttons
- A grid circle to trace over in an editor when you want to draw it yourself
Tips
- Odd diameters give a single center block; even diameters center on a 2x2
- For a dome, generate each layer's diameter separately and stack them
- Thick outline costs about a third more blocks than a plain outline at the same size
- Drop the PNG into the pixel editor if you want to tweak a block or two by hand
More free pixel art tools
 Tool
ToolPixel art editor
Create and edit pixel art sprites in your browser. Custom canvas sizes, paint tools, export as PNG or SVG.
 Tool
ToolSprite sheet pivot editor
Preview a sprite sheet frame by frame and set the pivot point, frame rate, and loop. Export a ready-to-use manifest.
 Tool
ToolNoise generator
Generate pixel noise patterns and textures — Perlin, checkers, bricks, random.
FAQ
Set the diameter you want in blocks, pick Thick outline, and use the grid as your layer plan. Lay the blocks row by row exactly as the preview shows, then repeat the same layer upward for a tower or vary the diameter per layer for a dome. The pixel count above the preview tells you how many blocks one layer needs.
A plain outline steps diagonally, so two blocks meet at a corner with a gap between them. In a build that gap is a hole: water pours through it and mobs path through it. Thick outline adds a block at every one of those corners so the wall is sealed. Use it for anything that has to hold something in or out. Plain Outline is fine when you only want the shape, and it uses fewer blocks.
The count sits above the preview and updates as you change the diameter or style. It counts one layer, so multiply by your height for a tower. Thick outline uses roughly a third more blocks than a plain outline at the same diameter, which is the price of a sealed wall.
Blocks sit on a square grid and a true circle does not, so every Minecraft circle is an approximation. What the generator does is pick the closest block for each position, which is the roundest result available at that diameter. Larger diameters look rounder because each block is a smaller fraction of the shape. Odd diameters give you a single center block, even diameters center on a 2x2.
Yes, for planning purposes. Each pixel in the preview is one block in your build, so a 32 diameter circle is 32 blocks across. The tool says pixels because it also gets used for sprite work, where the same grid is a texture rather than a wall.
Every command comes out as minecraft:dirt. There is no block picker on purpose, because nobody remembers the exact id of the block they want and a typo makes the command fail silently. The export is plain text, so find and replace minecraft:dirt with whatever you are actually building in. That takes one keystroke in any editor and cannot be got wrong.
Yes. Take either Minecraft function (.mcfunction) or Copy Minecraft commands from the download menu. Both give you the same thing: commands that build the layer at your feet, using relative coordinates centred on where you stand. Drop the .mcfunction into a datapack and run it with /function, or paste the commands into a command block. Horizontal runs are merged into fill commands, so a 256 filled circle is 256 commands rather than 51,468.
Yes. Unlink the two size fields with the button between them and set width and height separately, and you get the roundest oval for that box. Thick outline works on ovals too, sealing the diagonal corners all the way around the curve. Use it for arenas, racetracks, stadium floors, and hulls, or for eyes and UI pills in sprite work.
A sphere is a stack of circles whose diameter changes per layer. For a sphere of diameter D, the layer at height h from the centre has a diameter of roughly 2 x sqrt((D/2)^2 - h^2), rounded to the nearest whole block. In practice: generate the widest circle for the middle, then step the diameter down as you go up, generating each one. A dome is the same thing stopping at the equator, with a filled circle on top.
Generate the full circle at the diameter you want, then build only the half you need and read the rest off the preview as a guide. For an arch, use the top half and stop at the widest row. There is no half-circle mode because the full circle gives you every arc in it, and cutting it where you want is easier than picking an angle up front.
That is what it was built for. A pixelated circle is the shape that is hardest to draw by hand on a small grid, so this gives you a clean pixel art circle to start from: coins, shields, buttons, UI elements, anything round. Download as PNG for a sprite or SVG if you want to scale it. Both free, both with a transparent background.
Circles yes, full textures no, this tool only draws circles. For custom block and item textures there is a separate AI generator on this site that makes pixel art at the exact size you ask for. Note it starts at 32x32, so it is built for 32x resource packs rather than vanilla 16x16. See the texture section above for examples. Free tier, no card.